3D Rendering for Custom Jewelry Designs: A Retailer’s Guide
Creating custom jewelry for your customer is like making an art piece; it has to be presentable and one of a kind, and that’s why we are here to guide you, because it’s about showing a piece of art, whether through sketch or photography. Traditional methods such as photography and sketching are also good choices for presenting your jewelry, but there is something better than that.
Yes, it’s a 3D rendering of jewelry. And this is the right place to learn everything for retailers, agencies, or individuals who want to outsource their 3D rendering for custom jewelry designs like engagement ring, diamond pendants, bracelets or even watch will rendering.
In this post, we’ll talk about everything step by step to ensure you get the best without falling victim to scams by false or cheap services. Let’s dig in without wasting a second!
What is 3D Rendering?
It’s a detailed digital model CGI (computer-generated imagery) of jewelry; it can be an image or animated video, which is made by a render artist using CAD software and 3d rendering tools like Blender or KeyShot, and many more.
The process of creating high-quality jewelry rendering will need a high-performance processor, an experienced person who can create a CAD with details, and a very high-tech, knowledgeable render artist who understands the psychology of customers. Keeping all this in-house can be difficult, especially if you don’t need jewelry rendering very often or daily, because it will cost you so much and generate material waste, and that’s why there are some brands and individuals who offer this service to you.
Step 1: Define a Clear Design Brief
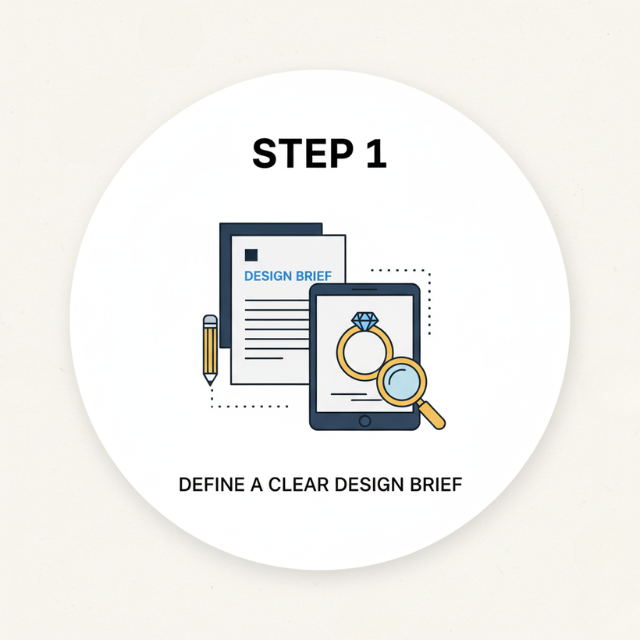
At a very first thing to start with is a brief design of your custom jewelry. When we use the word “customization,” it’s not some ordinary solitaire or some other common design; if it’s custom, it probably has some unique detail, which is why it’s called “custom.” The quality of your final jewelry rendering is directly proportional to the clarity of your initial brief. You cannot expect perfection if you haven’t defined the exact parameters of the design.
Think of the brief as the blueprint that guides the rendering service artist. So, when making a custom jewelry design rendering, you have to make sure to provide every small detail to your rendering service provider. This step bridges creativity, so you don’t have to make changes later, because not all brands will allow you to make changes again and again, and maybe some brands will charge you extra for repeated changes. So, keep this cost saving tip in mind and create a draft message or something with these points given below:
What to Include in Your Brief?
- Metal type:
The metal type is not always metal color; it can be a metal texture or metal tones. There are plenty of textures and metal color tones available. And when we talk about tone, it’s not just white gold, rose gold, or yellow gold, because every individual creates different tones that come from their skills and software. So, you have to make sure that their tone and texture match your brand aesthetic and that they are capable of bringing your vision to life.
- Stone details:
Now, let’s talk about the stone details. The visualization of your diamond will add value to your overall design. If your center stone is the star of the show, that means your jewelry pieces have a custom diamond shape or have a weird cut diamond. Find brands that have expertise in creating diamond renderings. Provide them with detailed information about the diamond’s facets, how you want it to sparkle, and the size and color of the diamond.
- Setting style:
If you are a retailer and sell jewelry, you know what setting style means. Which setting will go best with your final piece of jewelry, claw prong, bezel, etc.? Choose a setting wisely, as it will make sure your jewelry is wearable, safe, and looks like it is made with a blend of artistry.
- Exact dimensions:
That’s the basic; the dimensions represent the 360-degree details of your jewelry. If it’s a band, what bandwidth do you want? For a necklace, give them a neck length; for a bracelet, decide on the right wrist length.
- Lighting and background preferences:
Here comes the creative part: Lighting and background. If you have a brand aesthetic in mind, just tell them your brand’s color palette or theme. Or you can create a customized background based on your custom product storyline. It is also important to know what lighting you want; some want more sparkle, and some just want something subtle. Your rendering artist doesn’t know what you like, so you have to give a brief about this so both sides won’t face any difficulty later.
Please make a note of these points first, and then we can proceed to the next step.
Step 2: Choose the Right Render Output
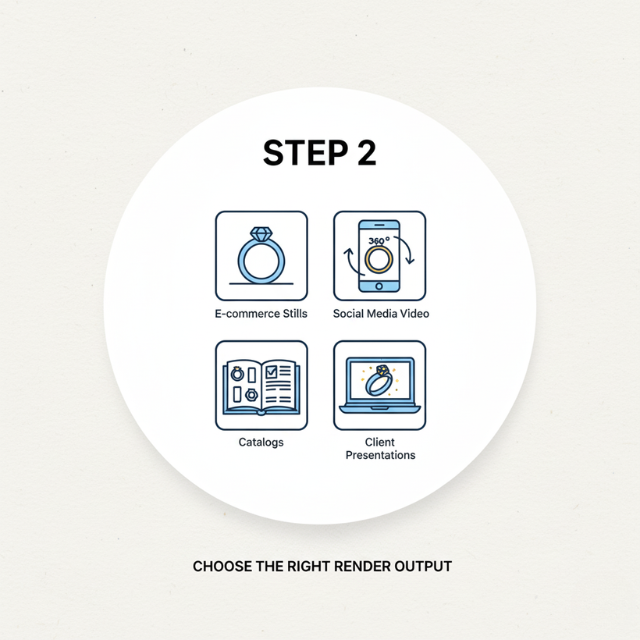
It’s a very simple and easy step to remember. In what format and size do you want your rendering to be created? You can ask to make any particular size, or you can ask for all sizes if you are not sure yet where to use the final result, so you can use it anywhere you want or use it on different marketing campaigns, but they may charge you a little extra for this. Here is your go-to guide table to select the size and format depending on the purpose you want to create your custom jewelry rendering. If you want to create more than this, you can also customize the size you want, as there is no limit on the length, width, or file size you want.
Rendering Output Sizes & Formats Guide
| Purpose / Platform | Recommended Size (pixels) | Aspect Ratio | File Format |
|---|---|---|---|
| Instagram Post | 1080 × 1080 | 1:1 (Square) | JPG / PNG |
| Instagram Story / Reel Cover | 1080 × 1920 | 9:16 (Vertical) | JPG / PNG |
| Facebook / LinkedIn Post | 1200 × 628 | 1.91:1 (Landscape) | JPG / PNG |
| Pinterest Pin | 1000 × 1500 | 2:3 (Vertical) | JPG / PNG |
| Website / eCommerce Product Image | 2000 × 2000 | 1:1 (Square) | PNG (transparent) |
| Website Banner / Hero Image | 1920 × 800 | ~2.4:1 (Wide) | JPG / WebP |
| Email Banner | 1200 × 600 | 2:1 | JPG / PNG |
| Print Catalog / Brochure | 3000 × 3000 (or higher) | 1:1 | TIFF / PNG (300 DPI) |
| 3D Animation / YouTube Video | 1920 × 1080 (HD) or 3840 × 2160 (4K) | 16:9 | MP4 / MOV |
Step 3: Ensure Realistic Diamond and Metal Representation
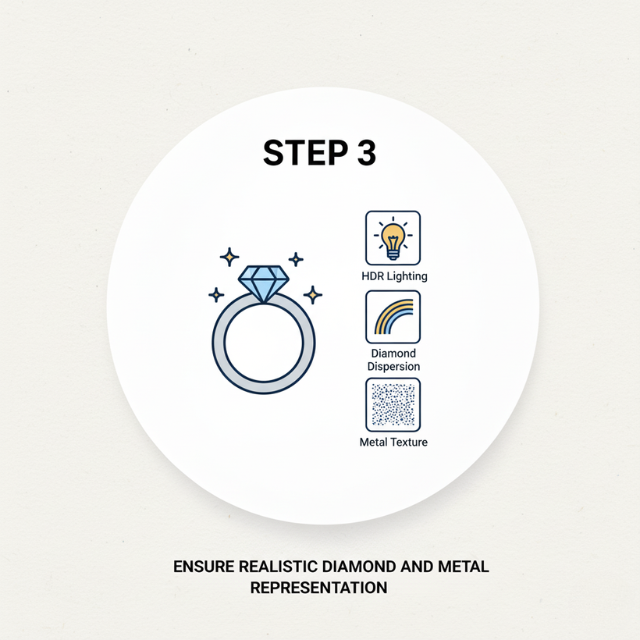
Let’s be real: your customers know when a render looks fake. A lot of the time, fake renders have bad shadows, odd lighting, too-white diamonds, and metal that doesn’t look right. A high price doesn’t make it a real job. What matters is how real it looks, just like in real life. If you sell jewelry, you know that just any digital image will not do the job. You need a render that has the right shine, feel, and brilliance. A diamond and precious metal should look real and feel like they have value. If your final render does not look like it is worth the cost, you will not make the sale. It can even hurt customer satisfaction.
- Simulate Light Physics: A good artist who works in CGI jewelry knows how to show caustics, which are the light shapes you get from the stone, and dispersion, which is the rainbow flashes that look like “fire” in the diamond. If the diamond does not show off this play of light, it will not get people to buy it. You should ask to see proof of this in their work samples.
- Use HDR Lighting for Lifelike Reflections: Using High Dynamic Range (HDR) lighting is key if you want your jewelry models to look real. The lighting comes from true data in the world. This is what helps you get real-looking reflections on the jewelry’s metal parts. Without this, the metal will not look like it has real weight or value. With simple digital lights, you only get a fake look, not a rich feel.
- Match Metal Texture: Make sure the feel and texture of the metal in the jewelry rendering is the same as what you will see in the real item. A very good jewelry rendering can show tiny marks, small dents, or different finishes, like brushed or hammered looks, not just one plain shine. Look at their previous models and jewelry rendering samples to see these details, not only polished surfaces.
Step 4: Protect Your Designs with NDAs
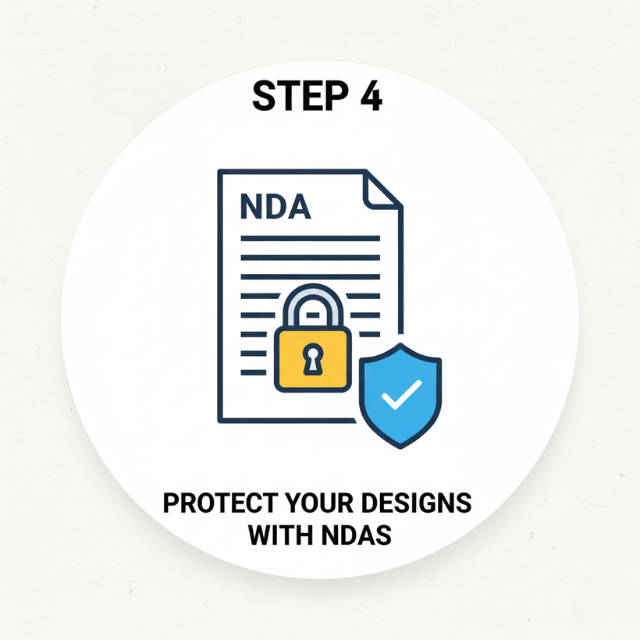
Wait a minute. Before you give your special design to someone, you need to know that this is your own idea and is important to your business. You should get a Non-Disclosure Agreement (NDA) signed. The NDA helps keep your design and plans safe. If the other person tries to skip this or says you do not need it, that is not good. It is better to leave and not work with them. You should not risk your one-of-a-kind design just to save some time. A few minutes of paperwork will keep you safe. There are some simple things to think about, which we will talk about below.
What to Include in an NDA of 3d Rendering for Custom Jewelry Designs
- Be clear when you talk about confidential materials. These can include CADs, renders, and sketches. Say which ones are not allowed to be shared.
- The ownership clause says you keep all rights. The service only does the work you asked for. It is not a creative partnership.
- They cannot share, reuse, or copy your designs. This makes sure they do not use your design to train their team or give it to other clients.
- Set how long the agreement lasts. Usually, it will be at least 1 to 2 years. Even after the work is finished, the NDA is still in place.
Step 5: Check the Workflow from CAD to Rendering
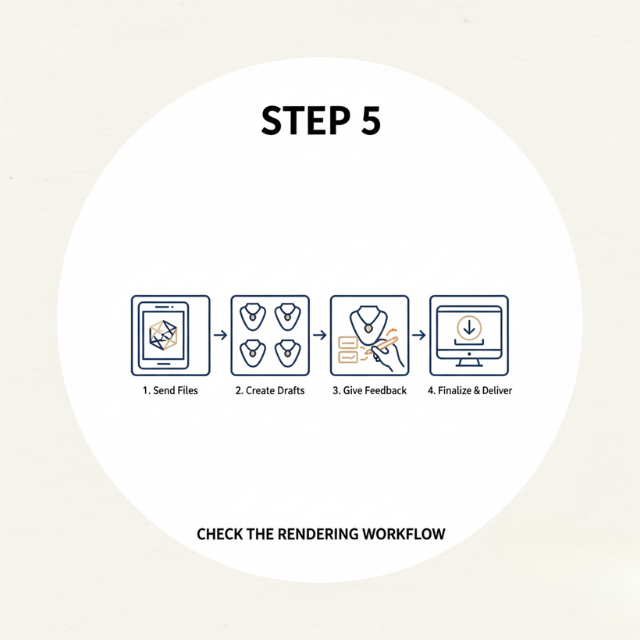
If you do not know the steps, it will be hard for you to keep track of time or how much you spend. Knowing how the service provider works helps you with what to expect. You will understand when things will be done and how changes will happen. This makes things move faster, and you will not waste time or money on delays going back and forth.
Most rendering studios follow a 4-step flow:
- Send your design files or sketches.
- They make draft renders.
- You give feedback and say what needs fixing.
- They finish and send you good, clear files.
Step 6: Balance Visualization Quality and Cost
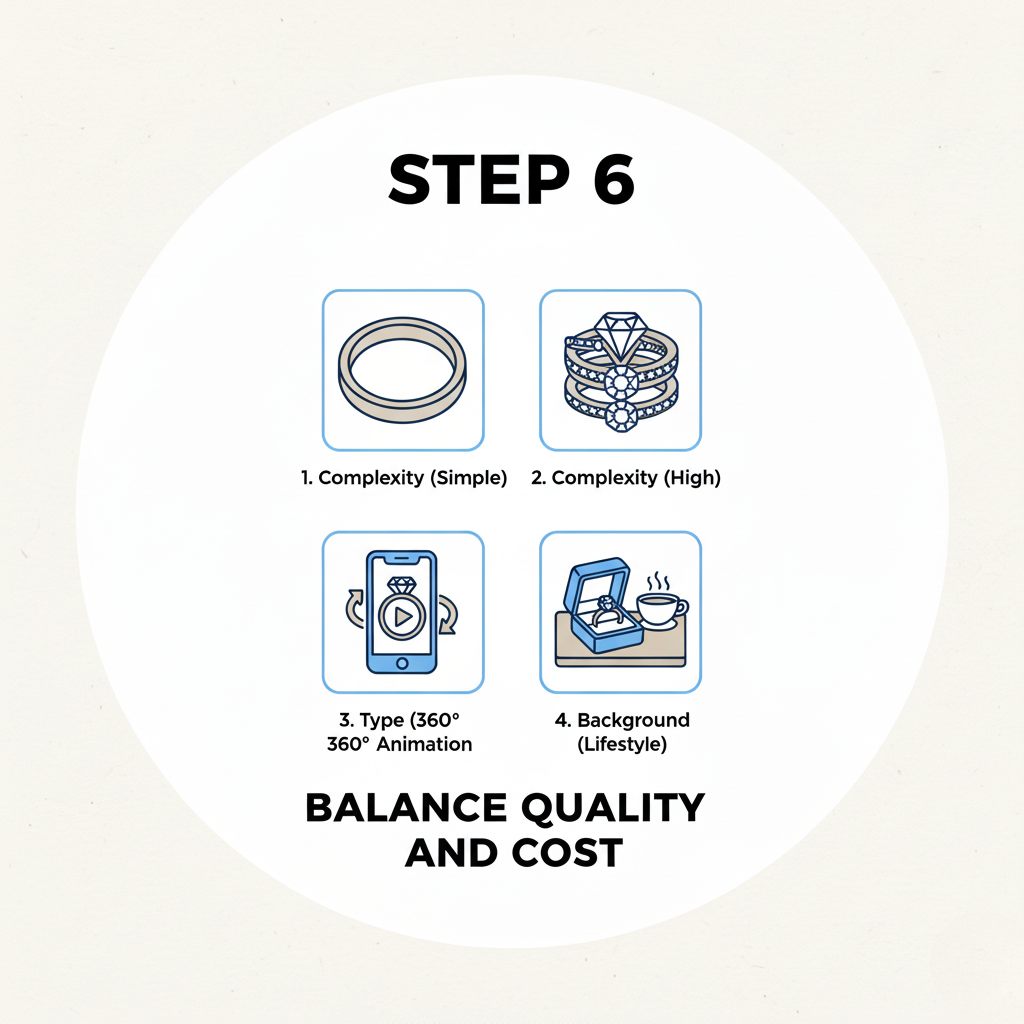
You should not pick a service just because it has the lowest price. It is good to know how the cost can be higher when things get more complicated. If you say clearly what you want at the start, there will be no surprise about how much you pay. This helps you avoid hidden costs.
Rendering costs vary based on:
- The number of designs matters. Bulk orders often get a discount, so talk about this early!
- How complex it is (plain bands or pieces with diamonds). A micro-pave will cost more than a bezel setting. That’s because the artist needs to set hundreds of small stones.
- The type of image you want (still images, animations, 360° spins). Animations will be much more expensive. This is because they need to be made frame by frame and need more computer power.
- The background style (a studio look or lifestyle scene). A plain white background will be cheaper. A lifestyle background with special settings will cost more.
Step 7: Confirm Ownership and Usage Rights
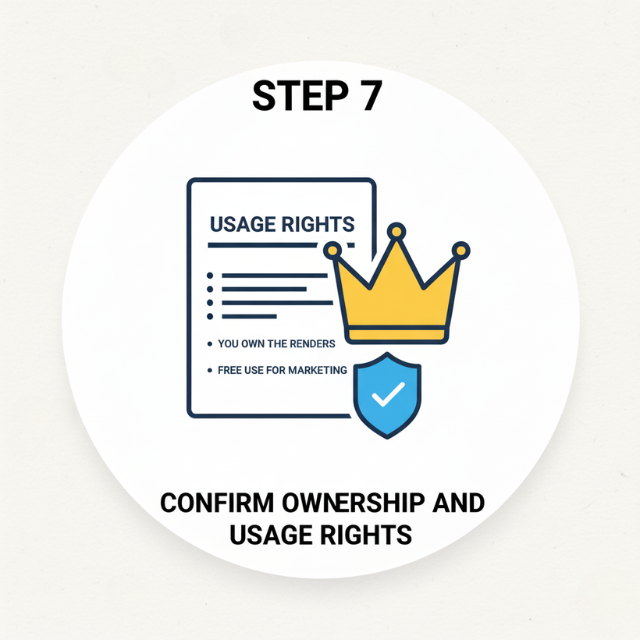
The images belong to you. The contract must clearly say this. This way, you are protected if you use the renders in ads you pay for or share them with the public. Do not think you can use the images without checking. A low-cost service might stop you from using the images in print ads or bigger campaigns. They might ask you to pay a fee if you want to use the images later.
Don’t Skip the Fine Print
Ensure your agreement clearly states:
- You have full ownership of the renders.
- You get to use them in your ads, on your site, or in print anywhere in the world for as long as you want. There are no limits on this.
- The studio must get your go-ahead to use your renders for its own ads. If it wants to show them in a portfolio, you need to say yes, and it should only show them after your product is out.
Step 8: Vet the Right Rendering Partner
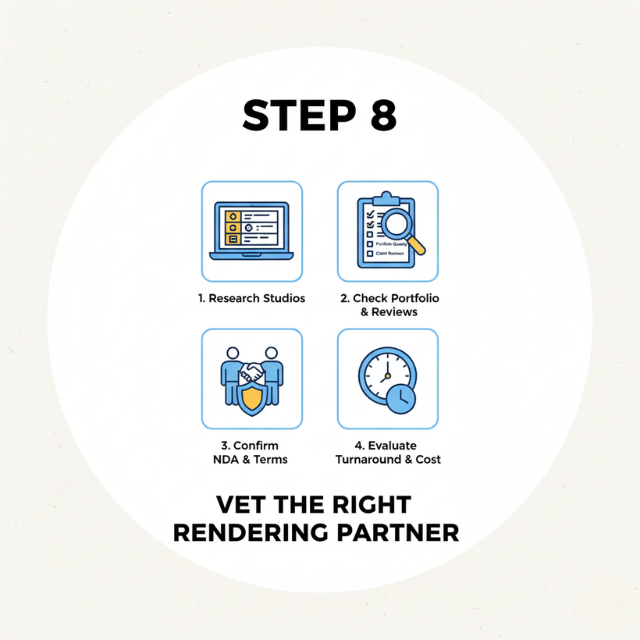
Finding the right partner is a lot like looking for a good setter. It is very important, they have skills, and they are not easy to find or replace. You need a service that is strong in personalization, feels real, and works fast. Do not feel shy about it. You should ask hard questions about their security steps and see solid proof of their past work.
Reliable Service Providers (with NDA Options)
Here are some trusted names to consider:
- 3D Jewelry Pro – This team gives you lifelike images, accepts NDAs, and works with people all over the world.
- Sarkissian studio – You get lifestyle scenes, 3d pictures, and safe ways to talk with them.
- Render Jewelry (India) – A good choice if you are a local seller. You get quick work and good prices.
- Finegrown – They keep your data safe with NDAs. They can handle bulk orders and have great samples, including creative animations.
- Freelancers on Upwork – There are different people to pick from. Make sure you set up NDA rules before you share anything.
What to Check Before Hiring:
- The quality of the portfolio.
- Reviews from past clients.
- A security policy and being ready to sign an NDA.
- Time taken to finish work, and how the service can handle more work.
When you follow these steps, you get great and true-to-life 3d rendering for your custom jewelry designs. You also keep your work safe and make sure your teamwork stays professional and doesn’t cost too much.
FAQs
Can I get a wax model made from a 3D jewelry rendering file?
Yes, you can do this, but you will need the CAD file, which is the original 3D model. This file is usually in STL or 3DM format. You cannot use just the final 3D rendering file to create a wax model because that is simply a 2D image, like a PNG or a JPG. A CAD file has all of the important geometric data. 3D printers or CNC machines use this to make the wax model that will be cast. If you want to go from the render to production, make sure you have ownership of the CAD file, as this is an important part mentioned in Step 4/7.
What software is most popular for 3D rendering in jewelry design?
The top companies use this popular software:
With CAD is easy when you use Rhino and the MatrixGold plug-in. These tools are the top choice to make exact 3D models that are set for production.
Rendering (CGI) is when artists use powerful computer engines like KeyShot or V-Ray. These tools help with the complex details of light, metal, and diamonds. They make the final image look very real. Blender is now also a popular choice. It has advanced and open-source features that many people like and use.
Is there an online community or forum for sharing 3D jewelry designs?
Yes, there are a few online communities where people talk about 3D jewelry designs. In these places, you can share your work, get new ideas, and talk with others who love jewelry design. A good number of these websites also have useful tips, guides, and feedback from many people. You can join in, learn, and share all kinds of designs there now.
Professional designers usually use special forums that connect to the CAD software they use, like Gemvision user groups, when they need technical help. They often share their portfolio work and get ideas on big CGI sites such as ArtStation. But when you’re working with custom designs, make sure you follow the advice from Step 4. You should never share your unique custom design files unless you have a signed NDA. This is important, no matter how safe the community feels.
What are the advantages of using 3D animation for jewelry marketing?
3D animation gives a lot of good things for jewelry marketing. It lets you show your jewelry from many angles, so people get a clear look at the pieces. With 3D animation, it is easy to show sparkles, shine, and all the small details, which can help bring more people in. You can use 3D animation to make nice videos for your website or social media. This also helps you stand out from others in the jewelry field. Customers can see how the jewelry looks before they buy, which can make them feel good about their decisions. By using 3D animation, you can show every part of your products in a way that photos alone may not do as well.
The main benefit is that it helps to get the most engagement and makes things clear. A 3D animation, like a 360° spin or a slow camera move, can do two things that photos in one place cannot do:
Showcase Brilliance: It shows the diamond’s sparkle and how light shines through it. Clients get a good idea of how the finished piece will look.
Eliminate Guesswork: It lets the customer see all parts of the piece, the height, band width, and every detail. This makes buyers feel sure of their choice and can help lower returns.